One of my artist book democratic multiples was purchased by the Maine College of Art this past weekend for inclusion in the Joanne Waxman Library special collections. So perhaps my work will outlive me.
How-To: Creating a mini-book
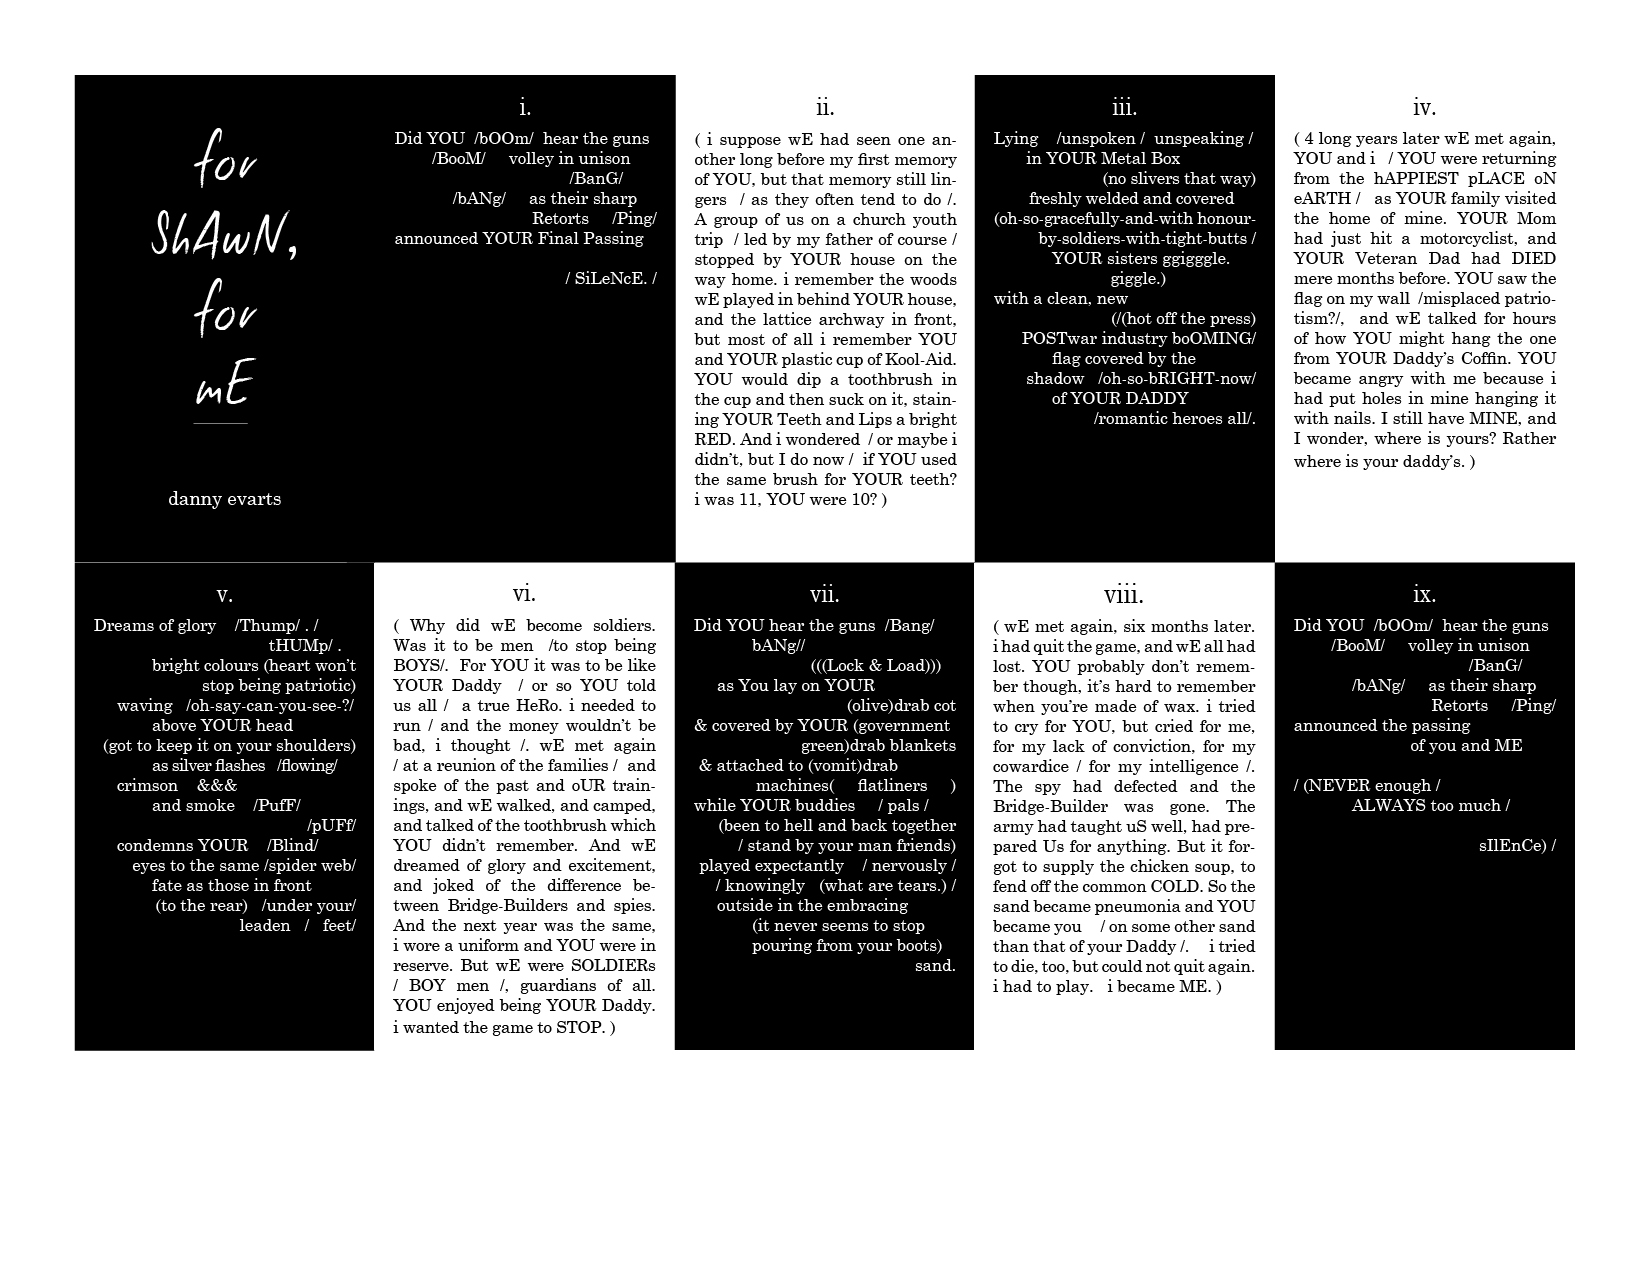
To accompany the handbound tunnel and accordion fold book, “for ShAwN, for mE” at a Book Arts show, I created a series of 108 handmade mini-books for visitors to take with them. They feature the same text as the large book, as well as an original lino block relief print that echoes a graphic theme from its parent. To really have fun, I made the covers using trading cards. It was a simple, though time-consuming, project.
You don’t need an insert for a book such as this, you could have the printed pages in one continuous sheet. But for this project I wanted the graphic, and it helped me conserve paper by being able to do the two text halves on one sheet. I could have also just attached the two text blocks together, but where’s the fun in that?
“Why an edition of 108?” you may ask (if you’re finicky that way). I always make extra over the intended number, so I can toss any that are horrible. I did toss (recycle) a few of this run, but didn’t want to waste the extra 8 that weren’t unusable over the intended 100, so went with a funky number.
Follow along in the pictures below to see how I constructed these books. Anyone can do this, and you don’t need special tools. Try it. Experiment. Have fun!

Text of the poem laid out on an 8.5″x11″ page for 2″x3.25″ panels. I printed these on a home printer on a Strathmore Linen paper (which you can get at office supply stores in the nicer papers section). You can use any paper, but I wanted to go with something a bit more elegant than cheap copy stock.

I cut the larger sheets into the smaller sections, then folded the panels for the accordion.
For cutting, use a straightedge with an x-acto, rotary blade, utility knife, or something similar. Or you can use an old-style bladed paper cutter or rotary paper cutter if you have one.
The extra strips of cut away paper can be recycled. I like to save them though, to use as paper pulp in papermaking, for future art projects or even to spin into paper threads.

For the center section, to connect the two sides of the text, I made a print to tip in. I began by hand-dying Arches rag paper, torn to size, by soaking it in a tub of water mixed with blue and green acrylic paints and inks, as I wanted each sheet to end up watery and different from all the rest. Using a template I’d cut out (from a piece of mat board left over from something else—I don’t like to waste anything), I then hand-painted the semi-circle/sun on each sheet. A lino cut reflecting a theme from the larger book was then cut and printed by hand.
An alternative to this would be to photocopy or print an image and use that.

To speed up folding of the inserts, I made a template the width of the image. I made mine from Book Binder’s board, because I have scraps of it lying around, but you could use cardboard or stiff paper or mat board or anything that will hold up. I then used a bone folder (use what you have on hand, the back of a butter knife or any dull edge would work—you don’t need special tools to create) to quickly mark the fold points. I then matched up the outside edges to find the center fold. The flaps of extra paper on the sides are necessary for attaching these to the text panels.

I next glued the insert to the left and right panels at the fold (I used a pva glue, but glue stick would work for this, as well). Put your glue on the extra paper flaps, and lay the text sheet over it. Press the attached portions well, using a dull edge, or roller, or your fingers, or anything that can apply pressure evenly to make sure the pieces adhere to one another.
Apply the glue over a piece of scrap paper and move the pieces off that scrap before attaching, and be careful to not get too much adhesive on the pages. Wash your hands often to remove excess glue so it doesn’t spread to your clean pages. This part can get messy.

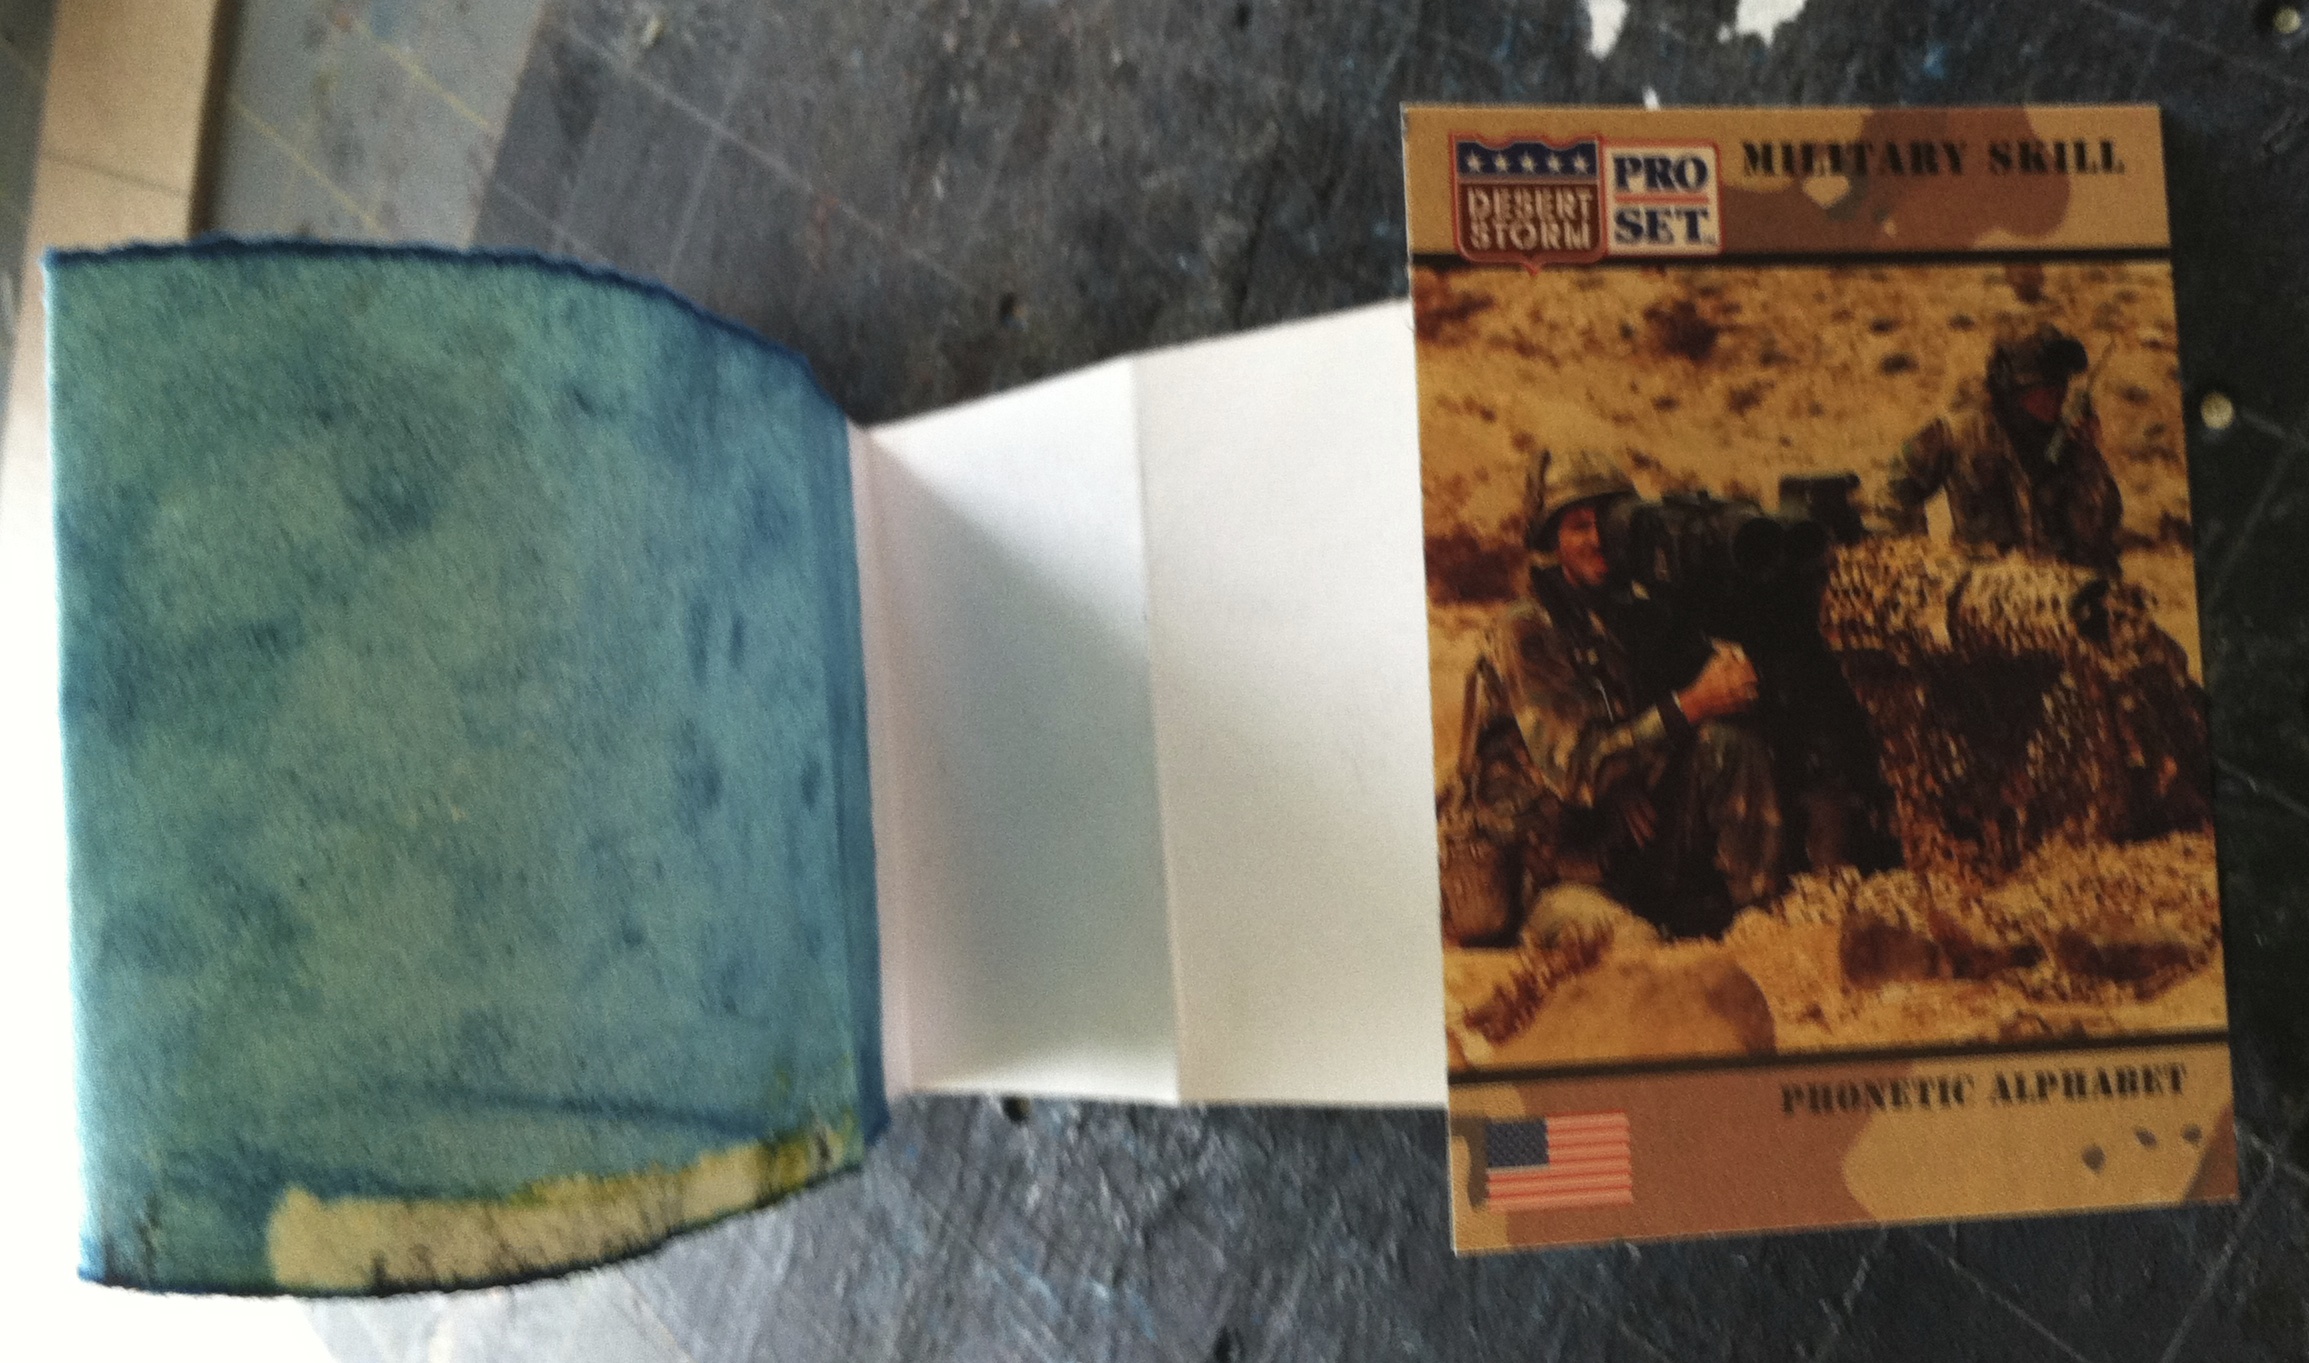
To match the text, I got my hands on a couple of boxes of Desert Storm trading Cards from 1991. I carefully chose which cards I would use for the front covers (they needed to have vertical images, and somewhat relate to the subject) and separated those, then used random cards for the back covers.

Back to the gluing! I applied glue to the backs of the first pages and then carefully aligned and attached cards. Again, be careful with the messy glue, and leave the pages spread open to let the glue dry without any bleed-over ruining your pages. Then do the same for the back covers, making sure to align them with the front. You may have to carefully fold the booklet closed to line things up, but open it up again after your back cover is on to allow the glue to dry. You don;t want all your pages stuck together permanently after all of this work.

Signing, dating, and editioning (numbering, as seen on the bottom left) the title page after they’re all completed is a nice touch, and makes it personal. I used a silver pen so it would show up on the black.
The fact that the card number 108 appears on card 1 of an edition of 108 is actually a spooky and happy coincidence. I didn’t even notice that until I was making up this how-to.

Each of these 108 booklets (the separately numbered Artist Proofs have already been set aside for the archives) is unique.
A hint for a project of this magnitude: Switch off between stages, both so you feel like you’re making progress and to avoid monotony. There’s nothing forcing you to finish everything in “order.” Have fun with it, and create!
If you do embark on such a project, please send me a photo of your completed project (or even send me a copy), as I’d love to see where this leads.
Book Arts at Stonehouse Show — Sep-Oct 2013
One of my Book Constructions will be appearing in the Book Arts at Stone House Student Show from 9 SEP-11 OCT 2013 at the Glickman Family Library in Portland, Maine. A reception and lecture, open to the public, will be held on September 16th from 4-6 pm. Stop by and see some imaginative constructions, and even my own piece (which is 12 feet long, so it will be a challenge for them to display).
For more information, stop by the University of Southern Maine Book Arts page.
Anatomy of a Print
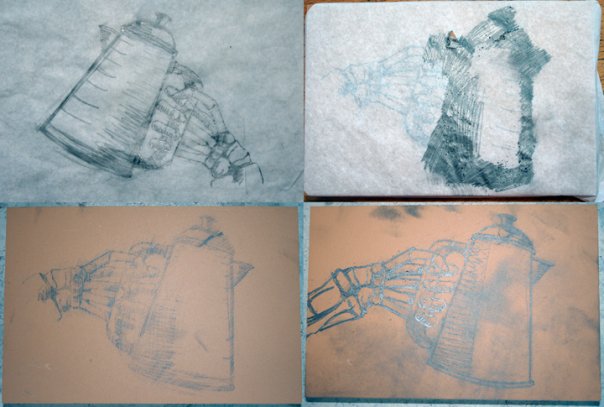
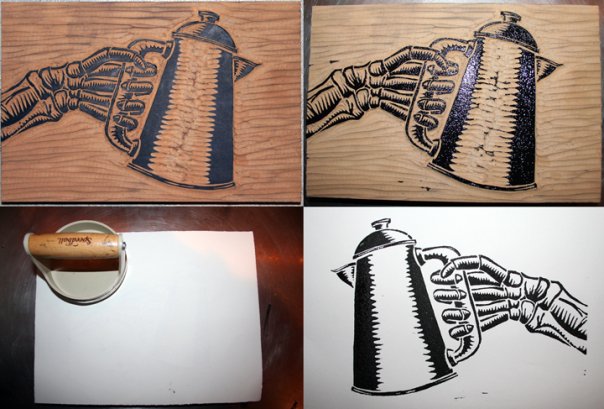
People sometimes ask about how I make my prints, so I took photos of the steps of carving a simple story illustration onto a 6″x9″ mounted linoleum block. I mostly did the sketch and xfer on paper, rather than on the block itself, to show my process.
Once I had an idea to sketch, the whole project took about 90 minutes (I was watching a movie while carving, so rather slow).

Top: Rough Sketch, Sketch half-transferred onto block
Bottom: Markings on block after xfer, Fleshed out pencil sketch on block

Top: sharpied outline, Outlines cut into block
Bottom: Partially carved and inked, fully inked and mostly carved

Top: The Finished block (I carved out too much from the coffee pot, but there’s nothing you can do once the material is cut away), Ink rolled onto the block for printing
Bottom: Printing the relief (sometimes I use a wooden spoon, or even the side of my fist or my fingers for delicate details and lighter shades, but here I use one style of baren), the final print


